Showing posts with label Sweet Sunday. Show all posts

Monday, February 9, 2015

Sweet Sunday: Festive Valentine's Day Desserts

Valentine’s Day wouldn’t be complete without sweets for your sweeties. This year shower your little ones with love by making them an extra special homemade dessert. Whether you’ve got ten minutes or two hours to spare, we’ve got an option that your Valentines will love. Here are a few of my favorites from Susie Foresman's list over at Red Tricycle. These will make you want to eat your heart out!

Chocolate & Pink Vanilla M&Ms Bark


Get your mini chefs involved in whipping up this simple but impressive treat from Food Family & Finds—just melt some chocolate and candy melts, swirl them together, then let the littles go to town topping with sprinkles and candies and breaking it into bite-sized pieces. Click here to get the full recipe.

Deep Dish Red Velvet Cookies


Red velvet is the perfect pick for Valentine’s Day, and this recipe from Show Me the Yummy is an easy way to make your loved ones smile. It’s the perfect size for sharing, and it gets even tastier with the addition of vanilla ice cream and some chocolate syrup. To grab the recipe, click here.

Glazed Strawberry Muffins


For a lighter dessert, whip up these pretty muffins from Garnish & Glaze. With strawberries dotted throughout and a lightly sweetened glaze on top, this one is sure to be a hit with your whole crew. Click here to snag the recipe.

Raspberry Bites


If you don’t have time to break out the apron and make a dessert from scratch, no worries. Keep it simple and stress-free with this cute idea from Saucy’s Sprinkles. Just pop high-quality chocolate chips into raspberries and let your tots gobble them up. Click here for all the details.

Valentine Puppy Chow


If your kiddos are fans of classic puppy chow (AKA muddy buddies), chances are they’ll love this Valentine-themed twist on that classic snack from Whimsy & Hope. It’ll come together in ten minutes flat with red velvet cake mix, M&Ms, and chocolate. Click here for the full recipe.

White Chocolate Raspberry Mousse


Keep things a little lighter but just as festive with this delish mousse recipe from Something Swanky. It may look complicated, but it’s actually super easy to pull off using an instant pudding mix, cool whip, and some raspberries. To get the recipe, click here.

Didn't see any you liked, find more HERE

Saturday, December 15, 2012

Sweet Sunday: Spiced Cranberry Coffee Cake

 
Great for breakfast, brunch, tea or dessert. A holiday staple.
 
~Spiced Cranberry Coffee Cake~
 
Ingredients:
 
3/4 cup(s) (1 1/2 sticks) unsalted butter, at room temperature, plus more for the pan
3 cup(s) all-purpose flour, plus more for the pan     
1 1/2 teaspoon(s) baking powder
1 1/2 teaspoon(s) baking soda
1 teaspoon(s) kosher salt
1 1/2 cup(s) granulated sugar
3 large eggs
1 1/2 cup(s) lowfat buttermilk
2 teaspoon(s) grated orange zest
2 cup(s) Spiced Cranberries or store-bought cranberry sauce
1 cup(s) roughly chopped walnuts
1 1/4 cup(s) confectioners' sugar
3 tablespoon(s) milk

Directions:

1. Heat oven to 350 degrees F. Coat a 9- by 13-inch baking dish with butter and lightly dust with flour. In a medium bowl, whisk together the flour, baking powder, baking soda, and salt.

2. Using an electric mixer, beat the butter and granulated sugar in a large bowl until light and fluffy, about 3 minutes. Beat in the eggs, then the buttermilk and orange zest. Reduce the mixer speed to low and gradually add the flour mixture, mixing just until incorporated.

3. Spread half the batter into the prepared baking dish. Dollop 1 cup cranberry sauce over the top, then gently spread, swirling it into the batter. Top with the remaining batter, then dollop with the remaining cranberry sauce.

4. Sprinkle the walnuts over the top and bake until the cake is golden brown and a pick inserted into the center comes out clean, 45 to 50 minutes. Let cool for 5 minutes.

5. While the cake cools, make the icing: In a small bowl, whisk together the confectioners' sugar and milk until smooth. Drizzle the icing over the warm cake, then let cool completely before serving.

I hope this ends your weekend on a sweet note!

Thursday, December 13, 2012

Party Pleasers: Little Cuties

 
I love the idea of Little Cuties. Translation: Fruit, custard, cream or meringue mini-pies baked in ½-pint, oven-safe mason jars. What a perfectly portioned treat. Just press the crust into the containers (available at Amazon, Walmart, even your hardware store). Choose a canned filling or whip one up yourself. Come dessert time, there’s no need to cut and serve. “People can grab a jar and dig right in,” says Shaina Olmanson, author of Desserts in Jars: 50 Sweet Treats That Shine. “They’re great for parties.” And your waistline - as long as you eat just one. Great as gifts too!

:: 2 Crowd Pleasing Little Cutie Ideas :: 

Mini Apple Pies: Who doesn't love apple pie!?!?

Ingredients:

2 boxes refrigerated pie crusts
8 Tbsp. butter
1/4 C flour
1/4 C granulated sugar
1/4 C brown sugar
1 Tbsp lemon juice
1 tsp cinnamon
1/4 tsp nutmeg
1/8 tsp salt
6 C sliced apples
1/2 C dried cranberries (optional)

Directions:

1. Heat oven to 350° and set out 8 wide-mouth 8 oz jars. Cut out eight 6-inch circles and eight small circles (using jar lid as guide) from 2 boxes refrigerated pie crusts. Press into bottom, up side and over the lip of jars.

2. In saucepan, melt 8 tbsp butter over medium-high heat. Stir in 1/4 cup all-purpose flour and cook, whisking continuously, until golden brown, 2 minutes. Add 1/4 cup each granulated sugar and brown sugar, 1 tbsp lemon juice, 1 tsp cinnamon, 1/4 tsp nutmeg and 1/8 tsp salt and bring to a simmer. Remove from heat and pour over 6 cups peeled, cored and thinly sliced apples and, if desired, 1/2 cup dried cranberries. Toss to coat. Spoon into jars.

3. Cut small dough circles into strips; weave into lattice and crimp edges. Brush with lightly beaten egg and sprinkle with turbinado sugar. Place jars 2 inches apart on large baking sheet. Bake at 350° for 45 to 55 minutes or until golden. Allow to cool.

Lemon Meringue Pies with a Thyme-Shortbread Crust : Herbed shortbread becomes the crust for this classic lemon meringue pie, adding a bit of a twist on an old favorite. These tiny treats will win the hearts of the lemon lovers in your life.

Ingredients:

For the shortbread crusts:
8 tablespoons (1 stick) unsalted butter, softened
1/3 cup sugar
1 cup all-purpose flour
1 tablespoon cornstarch
2 teaspoons fresh thyme leaves

For the lemon filling:
2 cups sugar
1/2 cup cornstarch
1/2 teaspoon salt
3 cups water
1 cup fresh lemon juice, from about 4 lemons
Grated zest of 4 lemons
4 tablespoons (1/2 stick) cold unsalted butter, cut into small pieces
8 large egg yolks, beaten

For the meringue:
8 large egg whites
1/2 cup sugar

Makes 10 individual lemon meringue pies

Directions:

1. Make the dough for the crusts: Cream together the butter and sugar until light and fluffy, 2 to 3 minutes on medium-high speed. Mix together the flour, cornstarch, and thyme in a separate bowl. Add the flour mixture to the butter and mix until incorporated.

2. Have ready eight wide-mouthed 8-ounce jars. Turn out the dough onto a piece of parchment paper. Shape the dough into a long cylinder with a diameter 1/2 inch smaller than the diameter of the jars you are using. Refrigerate for at least 2 hours.

3. Preheat the oven to 350ºF. Slice 1/4-inch slices of dough from the roll and place a slice in the bottom of each jar. Place the jars 2 inches apart on a large baking sheet. Bake the crusts for 10 minutes until just lightly golden. Remove from the oven and set aside.

4. Make the filling: Combine the sugar, cornstarch, and salt in a medium-size saucepan. Mix in the water, lemon juice, and lemon zest. Bring to a boil over medium heat, and stir in the butter until it is melted. Place the egg yolks in a heatproof bowl. Slowly pour 1/2 cup of the lemon mixture into the egg yolks, whisking continuously to temper the eggs. Whisk the egg yolks into the saucepan. Bring to a boil again and continue to cook over medium-high heat until the lemon filling is thick, about 5 minutes. Spoon the filling into the warm jars over the crust.

5. Make the meringue: In a large bowl, beat the egg whites until foamy. Beat in the sugar 1 tablespoon at a time until all is incorporated. Beat at medium-high speed until stiff peaks form. Spoon or pipe the meringue over the lemon filling in the jars, mounding it in the center to create peaks.

6. Place the jars 2 inches apart on a large baking sheet. Bake the pies for 10 minutes, or just until the meringue is golden brown. Remove from the oven, let cool completely, and chill in the refrigerator for at least 2 hours. Serve cold.

Wednesday, December 12, 2012

Goodies to Gift: Festive & Edible

 
Give the sweetest present this year; yummy treats wrapped in pretty packages!

:: Sweet ::

Peppermint Bark : 2 pounds (4 small tins) at $1.96 each

Chocolate-Peppermint Cake Pops : 48 pops at $.23 each

Layered Chocolate Cookie Mix : 1 jar at $7.33 each; 3 1/2 dozen baked cookies

Marbled Walnut Fudge : 4 dozen pieces at $4.01/dozen

Mixed Berry Granola : About 6 cups at $1.98 per cup

Cranberry-Poppyseed Biscuits : three 2 3/4 cup bags at $1.55 each

:: Salty ::

Chunky Salsa : Makes 10 cups at $1.53

Trio of Rubs : 1 jar (11 teaspoons) at $1.50 each

:: Fast and Easy Gift Packaging Ideas :: Raid your pantry and drawers for these items to repurpose on the fly...

Mason or other lidded glass jars: These are ideal for holding homemade candies, nuts and other small bites. Just sterilize with a quick boiling water bath first. A ribbon around the top makes it extra special.

Brown paper bags: Use lunch sacks or cut apart large bags to make wrapping paper. Add a gingerbread "icing" border around the top of the package with a white pen or white out. If you gift wrap, you can use yarn or stamps to do something other than ribbon.

Shoe, jewelry or other boxes: Pick a box based on the size or amount of your to-be-gifted treats. Wrap in paper and line with tissue or wax paper. No one will notice what the box originally held.

Dish towels or cloth napkins: If you have spares - or one in set that's not stained - bundle it around your sealed backed goods especially breadas and tie with twine or burlap ribbon. An old recipe card makes a perfect gift tag.

Oatmeal canisters: Cylinders are great for small items and easy to wrap. Roll in paper, cut it and tape it. Or create "candy wrapper" ends by gathering excess paper on either side of the tube with ribbon.

Decorative tin cans: If you don't have anything lying around the house, hit up the $1 store and pick yourself up a holiday tin can. Line with tissue paper or wax paper and you have an inexpensive,

Take-out boxes or favor boxes: Available at any craft store, with a lid or just the scalloped top ($20 for 50 at partycity.com) Line with food safe cellophane, tie with a stitched grosgrain ribbon and wah-la!

Wednesday, November 21, 2012

Last Minute: Thanksgiving Dessert

 
Scrambling for a last minute Thanksgiving dessert idea that's not the same 'ol pumpkin or apple pie? This is sure to be a crowd pleaser. Salty meets sweet in this grand finale, which turns classic candy into a delectable tart with a custardy no bake filling. And don't stress, if you're crunched for time or the thought of making your own butter crust is daunting, a store bought pie crust will work as well.
 
~Salted Caramel Tart~
 
Ingredients:
 
For Butter Crust: Yields (2) 9 -inch crusts
 
3/4 cup (1 1/2 sticks) butter (no substitutions), cut up, room temperature
1/4 cup sugar             
1/8 teaspoon salt
1 large egg, lightly beaten     
1 teaspoon(s) vanilla extract
2 1/4 cup(s) all-purpose flour

For Salted Caramel Tart: Serves 12

1 teaspoon unflavored gelatin                                                                                                               
4 tablespoon cold water
1 tablespoon light corn syrup
1 cup sugar
2 tablespoon sugar
2 tablespoons butter (no substitutions), cut up, room temperature      
1/2 cup sour cream, room temperature
1 3/4 cups heavy cream
1/4 teaspoon salt
1 1/2 teaspoon vanilla extract
Currants, for garnish (optional)     
Candied orange peel, for garnish (optional)     
 
Directions:
 
For Butter Crust: Prep time: 15 min. Total time: 35 min.
 
1. In large bowl, with mixer on medium speed, beat butter, sugar, and salt until pale yellow and well blended, occasionally scraping bowl with rubber spatula.

2. With mixer on medium-low speed, beat in egg, then vanilla, until well incorporated, scraping side of bowl.

3. With mixer on low speed, gradually beat in flour. Beat just until incorporated and dough forms large clumps. Divide dough in half and form each half into a 1-inch-thick disk. Cover tightly with plastic wrap and refrigerate at least 1 hour or until firm. (Dough can be refrigerated up to 1 day or frozen up to 3 months so you can even make this now for the Christmas holiday.)

4. With hands and fingers, press dough into even layer against bottom and up side of 9-inch pie plate or tart pan with removable bottom. Freeze 10 minutes or until firm. (Dough in pan can be covered tightly with plastic wrap and frozen up to 1 month.)
 
5. When ready to bake, preheat oven to 375 degrees F.

6. Bake crust 20 minutes or until golden brown. If crust puffs up, very gently push down bubbles with spoon without cracking crust. Cool crust completely on wire rack.

For Salted Caramel Tart: Prep time: 15 min.

1. In small bowl, sprinkle gelatin over 2 tablespoons water. Let stand at least 5 minutes to soften.

2. In 4-quart saucepan, combine corn syrup, 1 cup sugar, and remaining 2 tablespoons water. Heat to boiling on medium-high, stirring to dissolve sugar. Cook without stirring until mixture is amber, swirling pan occasionally; remove from heat.

3. Carefully whisk in butter, a few pieces at a time, until incorporated. (Mixture will bubble up.) Whisk in sour cream, then 1/4 cup heavy cream, until well blended. Add salt, 1 teaspoon vanilla, and softened gelatin. Whisk until gelatin dissolves and mixture is very smooth. Transfer to bowl and cool to room temperature.

4. Whisk remaining 1 1/2 cups heavy cream with remaining 2 tablespoons sugar until soft peaks form. Whisk in remaining 1/2 teaspoon vanilla. Gently fold half of whipped cream (1 1/2 cups) into cooled caramel mixture. Spread caramel in even layer in cooled crust. Refrigerate at least 6 hours or up to 1 day to set. Cover and refrigerate remaining whipped cream.

5. To serve, top tart with remaining whipped cream and garnish with currants and orange peel.

Enjoy!!

Sunday, October 28, 2012

Sweet Sunday


When fall hits (which it clearly hasn't in Southern California where it's still a sweaty 86 as I type), I crave apples. Maybe it's because I'm a born and raised Washingtonian that grows apples from far and wide but nonetheless, there is something about warm, gooey apple desserts that scream fall goodness.

I found this amazing Apple Bundt Cake over at a FarmGirl's Dabbles and personally think that it needs to be in everyone's fall baking rotation. It's moist, dense and filled with cinnamon-apple yumminess. The glaze is just plain fantastic, too. Its texture is thick and silky smooth. And the brown-butter lends it a deep almost caramel-like flavor, while the vanilla bean speckles tempt in the sweetest of ways.

~Apple Bundt with Brown-Butter Vanilla Bean Glaze~
Serves 12
 
Ingredients:
 
for the apple bundt:
1 T. butter and some flour for preparing the pan
4 medium apples – peeled, cored, & shredded (use the big holes on your grater), to make about 3-1/2 cups shredded apples – a mixture is best, maybe 2 Granny Smith, 1 Gala, and 1 McIntosh
1 T. fresh squeezed lemon juice
1-1/3 c. white sugar, divided
3 c. all-purpose flour
1 T. baking powder
1 T. cinnamon
1/2 tsp. mace
1/4 tsp. nutmeg
1 tsp. salt
1 c. brown sugar
1/2 c. vegetable oil
1/2 c. applesauce
4 large eggs
1/2 c. apple cider
2 tsp. vanilla
 
for the brown-butter vanilla bean glaze:2 to 3 T. half and half
2 c. sifted powdered sugar
vanilla bean seeds scraped from 1/2 a vanilla bean (split bean lengthwise and scrape out seeds)
4 oz. butter
2 tsp. vanilla
 
Directions:
 
For cake:
1) Preheat oven to 350°. Prepare a 12-cup bundt pan by smearing butter over every little nook and cranny of its interior. Then add some flour and tilt your pan so flour sticks to all of the buttery surface. Set pan aside.
 
2) Stir the shredded apple with lemon juice and 1/3 cup of the white sugar. Set aside.
 
3) In a medium bowl, whisk together the flour, baking powder, cinnamon, mace, nutmeg, and salt. Set aside.
 
4) In the bowl of a stand mixer, combine the remaining 1 cup white sugar, brown sugar, oil, applesauce, eggs, apple cider, and vanilla. Mix to combine. Then add the flour mixture and combine once again. Add the apples and mix until the apples are evenly distributed.
 
5) Pour into prepared Bundt pan and bake for 1 hour, or until a toothpick comes out of the cake clean. Cool the cake in the pan for 10 minutes, then invert onto your serving platter.
 
For glaze: If you are going to top the cake with the glaze, start making the glaze immediately, while the cake is still warm!
 
1) First, pour 3 tablespoons of half and half into a small bowl and set aside. This is just to take the chill off, while you prepare the rest of the glaze.
 
2) In a medium mixing bowl, combine the sifted (don’t skip the sifting!) powdered sugar and vanilla bean seeds. Set aside.
 
3) In a large saucepan over medium-low heat, warm the butter until golden brown. It should smell delicious and toasty. If it smells burnt, you went too far! This should take about 6 to 8 minutes.
 
4) Carefully pour browned butter into the powdered sugar and vanilla bean seeds, leaving the darkened butter sediment behind. Add 2 tablespoons of the half and half, then add the vanilla. Stir vigorously until smooth. You want the glaze to be somewhat thick, but easily pourable. If it seems too thick, add the remaining tablespoon of half and half.
 
5) Pour the glaze over the cake while both the glaze and cake are still warm!! The glaze cools quickly, so don’t delay! Let the glaze set. Then slice and enjoy!
 
Another option for serving this cake would be to finish it with a simple dusting of powdered sugar once it is cool. A dollop of slightly sweetened whipped cream or a scoop of vanilla bean ice cream would also be very good.
 
The cake fares well on the counter for a few days, covered with a cake dome.

Source: A Farmgirls Dabbles – The Bundt was adapted from Wanda’s Country Home. The glaze was adapted from Martha Stewart.

Sunday, October 21, 2012

Sweet Sunday

 
Rich in antioxidants, high in fiber, and loaded with vitamins, this festive marriage of chocolate and pumpkin is delish. Dig in and savor the season!

~Pumpkin Swirl Brownies~
Adopted by Marta Stewart

Ingredients:
1/2 cup (1 stick) butter
6 oz. semisweet chocolate, chopped, or 1 cup chocolate chips
4 large eggs
1 1/2 cups sugar
2 tsp. vanilla
2 cups all-purpose flour
1 tsp. baking powder
1/2 tsp. salt
1 cup pumpkin puree
3 Tbsp. canola oil
1 tsp. cinnamon
1/4 tsp. ground nutmeg

Directions:
1) Preheat the oven to 350F and spray a 9″x9″ cake pan with nonstick spray.

2) In a small saucepan, melt the butter over medium heat. Add the chocolate and remove from heat. Let sit for a few minutes, then stir until smooth.

3) In a large bowl beat the eggs, sugar and vanilla for 3-4 minutes, until thick and pale yellow. Add the flour, baking powder and salt and beat just until combined.

4) Put about a third of the batter into another bowl and stir the pumpkin, oil, cinnamon and nutmeg into it. Stir the chocolate mixture into the remaining batter and spread a little more than half of it into the prepared pan. Top with the pumpkin mixture, then drop large spoonfuls of the remaining chocolate mixture on top. Swirl a knife through both to create a swirled effect.

5) Bake for 40 minutes, until just set and starting to pull away from the sides of the pan. Makes 16 brownies.

I hope this ends your weekend on a sweet note!

Click HERE & HERE for other festive Halloween dessert posts.

Sunday, October 7, 2012

Sweet Sunday

Simple, insanely delicious, and a fun Halloween treat!

~Brown Butter Pumpkin Rice Krispie Treats~
Posted by In Sock Monkey Slippers
Makes 12 treats

Ingredients:
 
5 Tbs butter, unsalted
1 16 ounce package of marshmallows
1/3 cup pumpkin puree, canned or fresh
1/2 tsp pumpkin pie spice
1/4 tsp fresh grated nutmeg
1/4 tsp vanilla extract, or paste
1/4 tsp sea salt
7 cups Rice Krispies Cereal or other puffed rice cereal

optional ingredients:
for squares: 1 cup dark chocolate chips (60% cacao or higher)
for pumpkins: 12 tootsie rolls, green cookie icing


Directions:

1) In a large, preferably non-stick, pot heat butter over medium-low heat until it turns light brown, about 5 to 10 minutes. Stir occasionally. It will bubble, foam, and then caramelize. This will give the treats a nice nutty background flavor.

2) Once the butter is browned, add marshmallows and pumpkin puree and turn the heat down to low. Stirring occasionally, cook the marshmallows until they are completely melted. Remove from heat.

3) Important step: Step away from this insanely good smelling marshmallow goop for at least 5 to 10 minutes. Stir occasionally until the marshmallow mixture cools and becomes thicker. If you add the Rice Krispies too soon they will just get soggy in the hot marshmallows. Once the marshmallow mixture is cooled and thickened add the Rice Krispies. Stir and fold until combined.

4) For traditional Rice Krispie Treat Squares: pour the mixture into a buttered (not oiled) 13x9x2 baking dish or pan. Allow to cool and set for 15 to 30 minutes. Cut into squares and remove from dish. Melt chocolate chips in the microwave in 30 second intervals, checking and stirring in between, until melted. Pour the chocolate into a Ziploc bag. With scissors, cut a small slit in the corner and use it as you would a piping bag drizzling the chocolate over the rice krispie treats.

5) If your feeling Martha Stewart'esk: For the pumpkins - skip the baking pan and pour directly on a piece of parchment or wax paper. Allow to cool and set for 5 to 10 minutes until pliable. Grab a large handful and form into a ball. Greased hands help with this. Insert a tootsie roll at the top for a pumpkin stem. With green cookie frosting create pumpkin vines and leaves around the base of the stem. Serve.

I hope this ends your weekend on a sweet note!

Sunday, August 12, 2012

Sweet Sunday


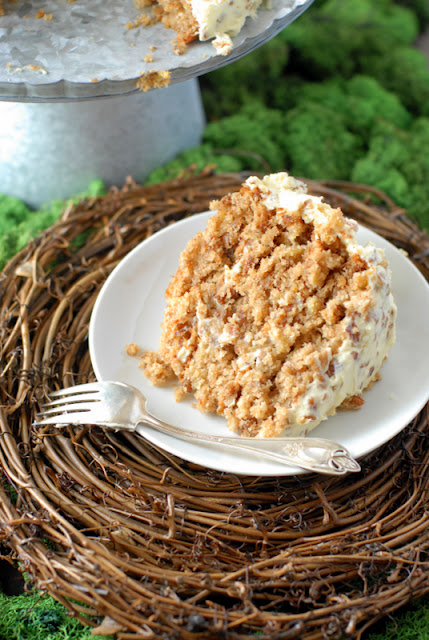
A little more time intensive than the desserts I usually like to blog about but so worth it. A delicious marriage between carrot cake and banana bread. Two of my all time faves. It's lighter than carrot cake, almost crumbly (though still in a moist way) yet bearing the distinct (though not overpowering) flavor of banana. It has a Cream Cheese Pecan frosting which gives a nod toward the Carrot Cake family. It's light and airy enough for a summer night but rustic and autumn'esk for the fall days to come.
~HUMMINGBIRD CAKE~
Modified from Country Home magazine (2008)
Prep/assembly time: 45 minutes | Baking time: 25-30 minutes | Cooling time: 15 minutes
Serves: 12-16 people

Ingredients (cake):
3 cups flour (gluten free or regular)
2 teaspoons ground cinnamon
1 teaspoon baking soda
1 teaspoon salt
1 cup granulated sugar
1 cup packed light brown sugar
3 large eggs, room temperature
1 cup vegetable oil
2 teaspoons vanilla extract
1 cup fresh pineapple, crushed (see below)
2 cups roasted bananas*, mashed (approximately 4 large or 6 medium-small bananas with peel left on)
1 cup chopped pecans
Parchment paper to line bottom of the cake pan

Cream Cheese Frosting:
1 ½ sticks unsalted butter, chilled
3-8 ounce packages of cream cheese, chilled
1 teaspoon vanilla
1 ½ cups powdered sugar, sifted
1 ½ cups finely chopped pecans

Directions:
1. Preheat the oven to 350 degrees. 
 
2. Place bananas on a cookie sheet with peels left on. Bake in the oven for 12 minutes until the skins are black (the bananas may leak which is fine). Remove and let cool until they can be handled. Peel bananas, place in a small mixing bowl and mash. Set aside. Leave the oven heated to 350 degrees.

3. Butter and flour 3-9 inch round baking pans. Trace the bottom of the pan (for all three pans) onto parchment paper, cut out circle and place in the bottom of each pan.

4. In a sifter over a large mixing bowl combine the flour, cinnamon, baking soda and salt. Sift into the bowl. Set aside.

5. In a second large mixing bowl combine the granulated and brown sugar; stir to combine. Add the eggs and stir briskly by hand to combine all ingredients into a smooth mixture.

6. Whisk the oil and vanilla into the sugar/egg mixture until combined and smooth.

7. Add the flour mixture all at once and hand stir (do not beat) to combine the mixture fully.

8.  Place 1 cup of finely diced fresh pineapple in a medium mixing bowl and using a potato masher, crush the pineapple. Add the fruit and juice to the batter. Also add the mashed banana and the pecans. Stir just until combined; do not over stir.

9. Divide the batter evenly between the three pans. Tap the pans on the counter top to release any air bubbles and place in the 350 degree oven for 25-30 minutes until cake bounces back to the touch and a toothpick inserted in the cake comes out clean.

10. Allow to cool in pans on racks for 5 minutes then turn out onto cooling racks to fully cool before frosting. Be sure to peel off and discard the parchment paper.

To Make the Cream Cheese Frosting:

1. Cut sticks of chilled butter into 1 inch pieces and place in the bowl of a standing mixer (can use a hand held mixer if needed). Beat on low speed, gradually increasing speed to medium until the butter is still cool but has softened together (about 3 minutes).

2. Cut the cream cheese into 1 inch strips and add to the butter. Mix at medium speed until fully combined, and smooth.

3. Add the vanilla and slowly add the sifted powdered sugar. Beat until well blended, increasing speed to beat on medium-high for 3 minutes or until the frosting becomes light and fluffy.

4. Fold in pecans by hand.

Cake assembly:

1. Place the first layer of cake upside down (the bottom of the cake will be frosted) on the serving plate. Cover with 2/3 cup of frosting. This will be a thin covering.

2. Place the second layer of cake right side up (flat cake bottom onto the frosting) and frost the top of this layer with 2/3 cup again (note: I found I needed just a bit more to cover this layer).

3. Place the last cake layer with cake right side up and use the remaining frosting to cover top of cake and the sides.

4. Allow cake to stand at room temperature 30 minutes before serving and store any uneaten cake in the refrigerator. Cake best when made the day prior to serving.


I hope this ends your weekend on a sweet note! 

Sunday, July 22, 2012

Sweet Sunday: A summertime must


Gosh it's been forever since I've done a Sweet Sunday post. Lance had a runny nose this morning so I stayed home from church, went on a nice power walk and figured since I have a minute while Barney streams on the tv, I'll post a dessert for you to try this week.

Saw these Jello Cookies on Pinterest and meant to post before 4th of July so you could do red, white and blue cookies but that clearly did not happen. Lots on my plate lately hence the lack of posts. Seriously though - who would have thought to put jello in cookies?!? What a fun bright and colorful cookie for summer. If you're brave enough to bring the kid's to the grocery store, you can make this a fun outing to pick out their special jello color/flavor.


Another fun thing is the batter is moldable like playdough. Wash up their hands, whip up the batter and let them create sculptures while the oven heats up like they did over at I Heart Naptime blog...


~Jello Cookies~
Yields: 2 dozen | Prep: 20 min | Cook: 10 min | Ready in: 30 min

Ingredients:
3.5 cups flour
1 tsp baking powder
1.5 cups salted butter softened
1 cup sugar
1 egg
1 tsp vanilla
4 (3 oz) pkg jello (use any flavors you want)

Directions:

1) Preheat oven to 350 degrees.

2) Beat butter in large bowl with mixer until creamy. Add sugar and beat until light and fluffy. Blend in egg and vanilla. Mix flour and baking powder in a separate bowl. Gradually beat in flour mixture.

3) Divide dough into 4 sections. Sprinkle 2 Tb of jello onto each section. Knead together with dough. You may want to add a few drops of food coloring to make the dough more vibrant.


4) Shape dough into 1-inch balls. Roll in the extra jello from the packets. Place, 2 inches apart, on baking sheets. Flatten with bottom of bowl.

5) Bake 8 to 10 min at 350 on lined baking sheets. Cool on baking sheets 2 min. Remove to wire racks and cool completely.

I hope this ends your weekend on a sweet note. Enjoy!!

Sunday, June 17, 2012

Sweet Sunday


Citrus meets creamy sweetness in this refreshing dessert. A low fat summer hit around my house courtesy of Shape.com.

~Lemonade Mousse~
Serves: 12
Prep time: 10 min

Ingredients:
1 cup graham cracker crumbs, crushed
1 tbsp sugar
1 tbsp light butter, melted
1 14-ounce can fat-free sweetened, condensed milk
3/4 cup (6 ounces) frozen lemonade concentrate, thawed
2 cups frozen nondairy whipped topping, thawed

Directions:
1) Using a fork, combine the graham cracker crumbs, sugar, and butter.
2) Lightly press 3/4 of the graham-cracker mixture on the bottom of a 9x13-inch pan (or single serving cups).
3) In a large bowl, mix together condensed milk and lemonade.
4) Fold in the whipped topping.
5) Pour over the graham cracker crust.
6) Sprinkle remaining graham crumbs over the lemonade mixture.
7) Cover and chill for at least 4 hours, preferably overnight.

Nutrition Score per serving: (1/2 cup) 183 calories, 73 g carbs(2.9%), 4.16 g fat(20%), 0.3 g fiber, 7 g protein(35.5%)

I hope this ends your weekend on a sweet note! And happiest of days to all the father's out there!

Sunday, May 27, 2012

Sweet Sunday


Who doesn't love kabobs?! I mean seriously, this might just be the easiest summer dessert evah. No baking and ready in minutes. Plus they look cute too. You could even doctor them up with bananas or blackberries. Your call. And I like to serve with a dollop of whip cream for dipping. Perfect for a summer BBQ or 4th of July shindig. Or better yet - whip them up tomorrow for Memorial Day!

~Strawberry Shortcake Kabobs~

Ingredients: Serves 4
16 medium strawberries, hulled                                                 
Angel food or pound cake, purchased at local grocery store                                               
1/4 cup semi-sweet chocolate chips
1 T reduced-calorie margarine
Whip cream, optional

Directions:
1) Line a cookie sheet with waxed paper
2) Alternately thread 4 strawberries and 3 shortcake quarters onto each of 4 wood or metal skewers
3) Combine chocolate chips and margarine inn a small saucepan
4) Melt over low heat, stirring, until smooth and well-blended
5) Drizzle chocolate over kabobs
6) Refrigerate until set, about 4 minutes

I hope this ends your weekend on a sweet note!

Sunday, May 6, 2012

Sweet Sunday

Courtesy of Sport'n'Fitness

Need a healthy substitute for ice cream or sugary frozen treats? Try JELL-O Pudding Pops. I love treats like this for my night-time sweet tooth. Just the right amount to satisfy without a ton of calories.

Double the recipe and make a large batch in 3 oz. Dixie cups and keep on hand for those warm days. A big hit with the kids!

~Jello-O Pudding Pops~
 
What you'll need:
3 oz. Dixie cups
Wooden popsicle sticks
 
Ingredients:
1 package JELL-O Chocolate Sugar-Free Pudding
2 cups Fat-Free Milk
1 cup Sugar-Free Cool Whip

Directions:
1) Beat pudding mix & milk in medium bowl with whisk for about 2min
2 Stir in Sugar-Free Cool Whip
3) Spoon mix into small paper/plastic cups
4) Insert wooden sticks into the middle of each
5) Freeze for 4 hours or until firm.

To remove from cups, run under warm water.

I hope this ends your weekend on a sweet note!

Sunday, April 22, 2012

Sweet Sunday


Thanks to Tobi Fairley's Pinterest page, I found this easy peasy no bake recipe from My Baking Addiction that uses the ever so popular chocolate goodness, Nutella. Wondering who the heck Tobi is? Unfortunately, Tobi is not a friend of mine. Nor does she even know I exist. She just happens to be one of my favorite Interior Designers that I love to follow who uses colorful, bold patterns to liven up her fresh and simple design. If you want to be inspired like I continually am by her, check out her blog here.

~No Bake Nutella Cheesecake~

Yields: 4-6
Prep: 15 min


Ingredients:

For the Crust:
12 Oreo Cookies, crushed into crumbs
3 tablespoons unsalted butter,  melted

For the Filling:
1 (8 ounce) package cream cheese, softened
2/3 cup Nutella
1 teaspoon pure vanilla extract
1 (8 ounce) tub frozen whipped topping, thawed

For the Garnish:
whipped topping, optional
chocolate shavings, optional
toasted, chopped hazelnuts, optional

Directions:

1. In a medium bowl, stir together the Oreo cookie crumbs and melted butter. Evenly divide the crumbs between your individual serving dishes and press into the bottoms of the dishes to form a crust layer.
2. In a large bowl, with an electric mixer, beat the cream cheese and Nutella until smooth. Add vanilla and mix to combine. Using a rubber spatula, fold in the whipped topping until well blended and no streaks remain.
3. Evenly pipe or spoon the filling into individual serving dishes. Cover with plastic wrap and refrigerate for at least 2 hours before serving.
4. If desired, garnish with additional whipped topping, chocolate shavings, and/or toasted, chopped hazelnuts.

I hope this ends your weekend on a sweet note!

Sunday, April 15, 2012

Sweet Sunday


Mini Buns. Majorly quick. Yes please. Now.

These gooey cinnamon rolls take just 20 minutes and pack few than 75 calories apiece. Hooray for healthy shortcuts!

~Cinnamon Rolls~

Ingredients:
Pillsbury Simply Buttermilk Biscuits (they're made without high-fructose corn syrup or trans fat)
Land O' Lakes Cinnamon Sugar Spread
Reduced Fat whipped cream cheese (optional)
Cinnamon
Directions:
Preheat oven to 375 degrees F.
Coat a 9-inch round pan with cooking spray.
Flatten 10 biscuits on a cutting board.
Top each biscuit with a teaspoon of the sugar spread.
Roll and cut into thirds.
Place in pan overlapping as needed, top with cinnamon.
Bake for 15 minutes.
Let cool; frost with cream cheese (optional)

I hope this ends your weekend on a sweet note! (Or starts your morning off right!!)

Sunday, April 1, 2012

Sweet Sunday


How adorable are these little bird's nests? Too cute and too easy. No baking. Minimal ingredients. The perfect treat on a busy week leading up to Easter.

~Chocolate Nests~
Courtesy of Pastry Affair (with a few variations)

Yields 8-10 3-inch nests

Ingredients:
3 cups crispy chow mein noodles or pretzel sticks
1 cup chocolate chips
1/2 cup peanut butter or butterscotch chips
30 candy robin eggs (picture shows mini whoppers, but you could use jelly beans, foil wrapped eggs, or anything egg shaped)


Directions:
1) Place the chow mein noodles (or pretzel sticks) in a medium mixing bowl.
2) In a small saucepan, melt together the chocolate chips and peanut butter (or butterscotch) over low heat. Stir until smooth.
3) Pour over the noodles/pretzels and stir until evenly coated.
4) On a cookie sheet covered in parchment or wax paper, take a handful of noodles/pretzels and form a nest, making an indent in the center or form in a muffin tin. Continue doing so until all the noodles/pretzels are used.
5) Refrigerate the cookies to set the chocolate for 30-45 minutes before serving.
6) Place eggs in nests. Store in an airtight container in the refrigerator.

I hope this ends your weekend on the sweet side!

Sunday, March 18, 2012

Sweet Sunday

Courtesy of Can You Stay for Dinner
What if I told you that you could have your cake and eat it too for only 100 calories? And whole grain. And nonfat. And made from real, wholesome ingredients? 'Nough said right? Thanks to the cookbook, Vegan Cupcakes Take Over the World, you can now enjoy a dessert that both feels good and tastes good too!

Each of these cupcakes is moist, tender, soft crumbed, and plenty chocolatey. And unlike lots of healthy baking projects, these are ones I would serve to someone other than my husband. Healthy yet fabulous enough to share with friends and strangers. They’re gently sweet and have a decidedly lighter texture than most of the non-fat cake recipes I’ve tried. Splendid.

Courtesy of Can You Stay for Dinner

~100 Calorie Chocolate Cupcakes~

Ingredients:
1 cup nonfat or low fat milk, dairy or nondairy
1 teaspoon apple cider vinegar
1 cup all purpose flour –OR- whole wheat pastry flour
1/3 cup unsweetened cocoa powder
3/4 teaspoon baking soda
1/2 teaspoon baking powder
1/4 teaspoon salt
3/4 cup packed light brown sugar
1/2 cup unsweetened apple sauce
1 teaspoon vanilla extract

Directions:
1) Preheat oven to 350 degrees. Line a standard 12 cup muffin tin with paper liners. Spritz them lightly with nonstick cooking spray.

2)  Combine a cup of milk with 1 teaspoon of vinegar, preferably apple cider vinegar. Set that aside for a few minutes so that it can curdle, like buttermilk.

Note: You can use dairy milk or nondairy milk, nonfat milk or whole. All varieties- everything from almond milk to 1% to soy - work well. The point is to create a light buttermilk (though using less acid than a traditional buttermilk), which will chemically react with the baking soda in the recipe to help the cupcakes rise while baking.

3)  In a medium bowl, whisk the dry ingredients: 1/2 cup all purpose white flour, 1/2 cup whole wheat flour (you can also use whole wheat pastry flour with even better results), 1/3 cup unsweetened cocoa powder, salt, baking powder, and baking soda. Set this mixture aside.

Note: Using all white flour produces the lightest, fluffiest texture, and the one most closely resembling a standard, full-fat cupcake. Using 1/2 white flour and 1/2 whole wheat is quite perfect. Nutritionally, you’re getting a better-for-you dessert, and the texture isn’t compromised. Using all whole wheat flour turns out well too, it’s just that the cupcakes bake up denser. If you want to use 100% whole grains in the recipe, though, use whole wheat pastry flour, as it lends a softer, more tender texture than traditional whole wheat flour. Use whatever you like.

4) In a large mixing bowl, combine 3/4 cup brown sugar with 1/2 cup of apple sauce and 1 teaspoon vanilla extract.

Note: Replacing the fat in the recipe with applesauce yields great results. The cupcakes are extra moist from the substitution, but they are a bit heavier in texture because of it.

5) Pour in the milk mixture. You’ll notice that the milk has begun to separate and curdle. Give all wet ingredients a thorough stir.

6) Add your dry ingredients to the wet ones and stir just until incorporated. The batter will be much thinner and more runny than traditional cake batters, almost like a pancake batter.

7) Divide the batter evenly among the cups and bake for about 18 minutes, until a toothpick inserted in the center of one comes out clean.

8) Let the cupcakes cool for at least 10 minutes in the pan set on top of a wire cooling rack before removing from the pan to cool completely. When they’re cool, frost with your favorite fluffy whipped vanilla frosting - See below.

Cupcakes -- Calories: 108.7, Fat: 0.6g, Cholesterol: 1mg, Sodium: 15.4mg, Carb: 29.7g, Fiber: 1.2g, Sugars: 20.5g, Protein 2.2g

Need a frosting recipe? Try this Whipped Frosting from Missy Dew over at Tasty Kitchen. It's a smooth, silky, fluffy, subtly sweet frosting - almost like whipped cream but more substantial. One that will leave you saying, "that's the best frosting I've ever had!"

Courtesy of Can You Stay for Dinner
~Whipped Frosting~

Ingredients:
5 Tablespoons Flour
1 cup Milk
1 teaspoon Vanilla
1 cup Butter
1 cup Granulated Sugar (not Powdered Sugar!)

Directions:
1) In a small saucepan, whisk flour into milk and heat, stirring constantly, until it thickens. You want it to be very thick, thicker than cake mix, more like a brownie mix is.

2) Remove from heat and let it cool to room temperature. (If I’m in a hurry, I place the saucepan over ice in the sink for about 10 minutes or so until the mixture cools.) It must be completely cool before you use it in the next step.

3) Stir in vanilla.

4) While the mixture is cooling, cream the butter and sugar together until light and fluffy. You don’t want any sugar graininess left.

5) Then add the completely cooled milk/flour/vanilla mixture and beat the living daylights out of it. If it looks separated, you haven’t beaten it enough! Beat it until it all combines and resembles whipped cream.

I hope this ends your weekend on a sweet note!